

.png)
Recently, my colleagues and I developed an emailing module for a product. We wanted it to be similar to other email services such as Gmail and Outlook. A user would be able to send emails to one or more people, receive emails and reply to the ingoing and outgoing emails. It was required to store email data like subject, body, recipient's email, sender's email, status(whether it was delivered or not), and the reference of the email(in case it is a reply email).
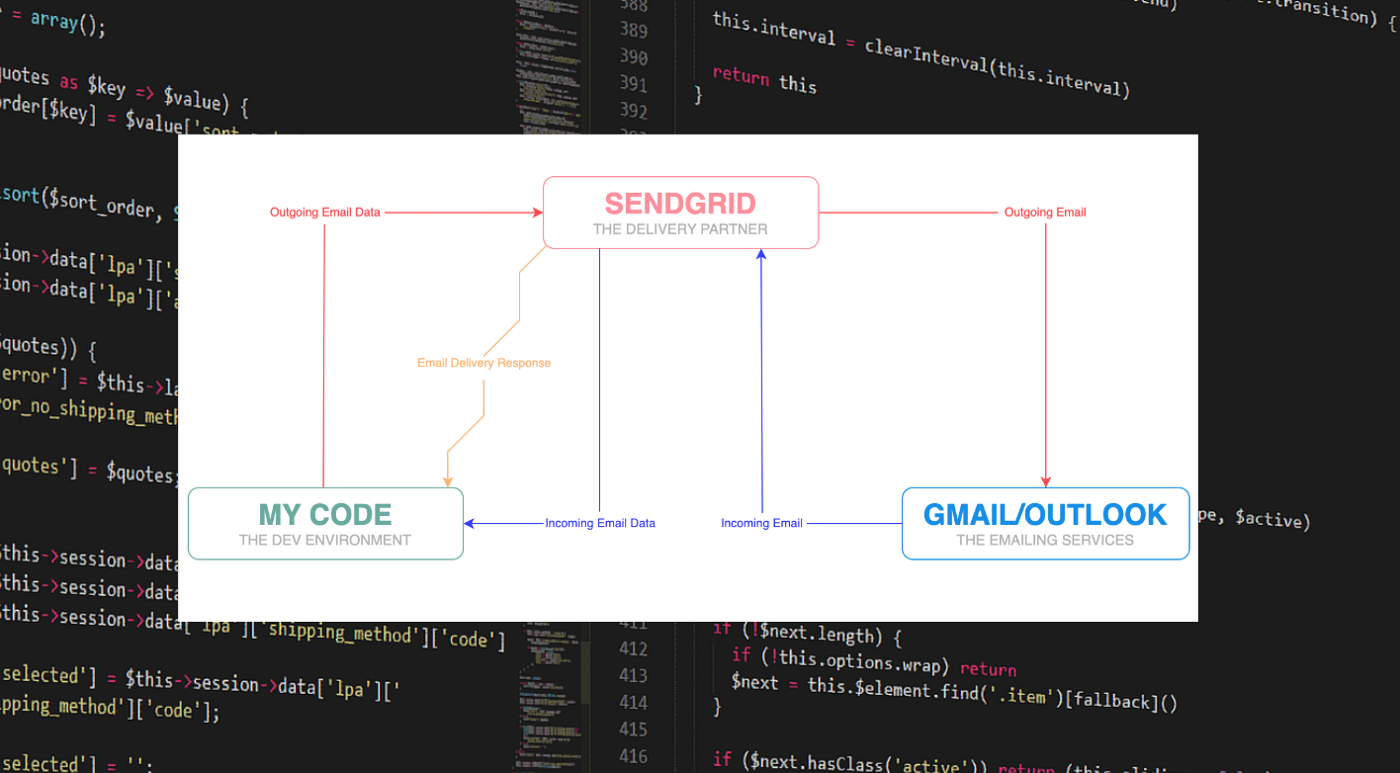
After conducting a thorough research on email delivery partners, we decided to use SendGrid. SendGrid works like a middleman. It extracts the outgoing email data from our code, sends it to the destination email address, and then sends the delivery status as a response. Similarly, it receives the incoming email data and sends it as response to our code. All in all, the process looks something like this:
I understood SendGrid's fundamentals from its documentation. However, there were quite a few moments where I got stuck and had to spend hours combing through online resources like StackOverflow. Occasionally, I would just go with the classic hit-and-trial method.
Now, after successfully configuring the email module, I wanted to share the solutions of some of the major problems we faced.
EMAIL DELIVERY STATUS
After sending an email through your code, you may want to know what happened to it. What is its status? Did it actually get delivered or got bounced back and never reached the destination email?
Knowing what happened to your email:
After we sent an email through our code, email delivery partners (SendGrid in my case) got back to us with a webhook response that had to be caught by our code. Simply put, you must create an endpoint where SendGrid can POST all the data relevant to the status of your email. The endpoint I used looked something like this:
https://my-app.com/api/v1/emails/response/
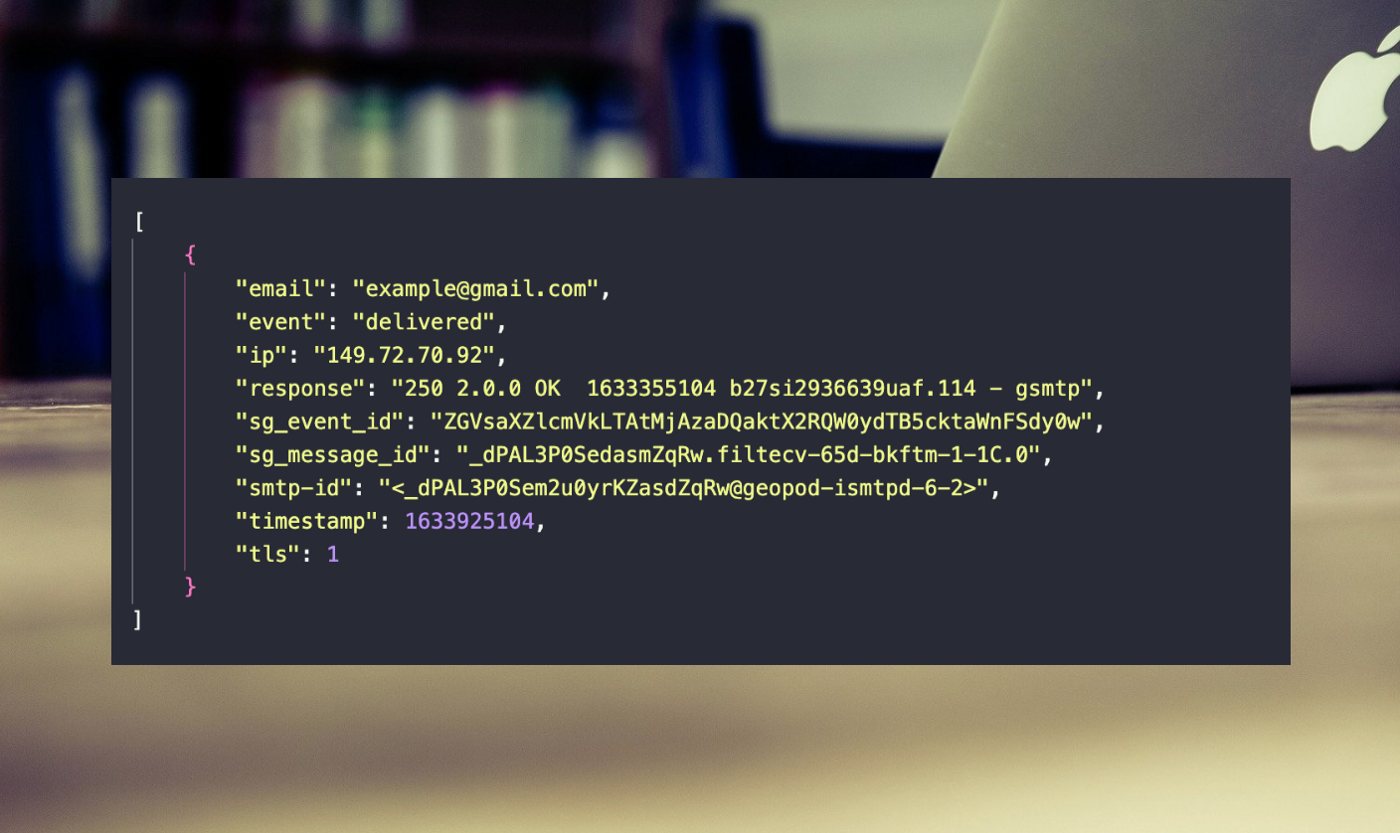
The response shows whether the email was delivered or not. If not, it notifies if it was bounced back due to a wrong destination email address or some other issue. The response looks something like this:
Exposing your local dev environment to the delivery partner:
During development, there are a few things you must do before you can actually start receiving responses to your emails. SendGrid (or any other delivery partner) is not aware of your machine. For SendGrid, your code does not exist to catch any responses.
This is where 'ngrok' comes in!
Ngrok is a tool that exposes your local environment to the internet. All you have to do is download it, place it in a directory and from that same directory, run the following command from your terminal: ‘ngrok http [the port you want to make it live at] eg; ngrok http 8000’. This provides you with a subdomain where your code is hosted temporarily. Next, you have to replace your base URL with the subdomain address like this:
With base URL:
https://my-app.com/api/v1/emails/response/
With temporary subdomain:
[temporary-subdomain]/api/v1/emails/response/
Tying up the response with the concerned email:
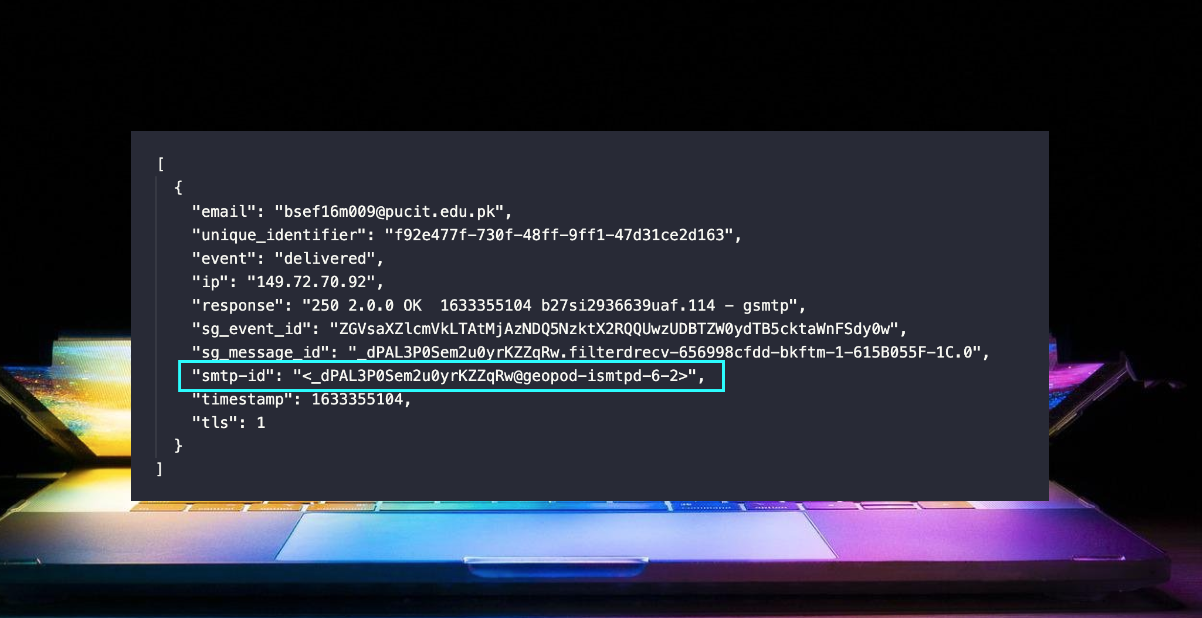
Upon receiving a delivery status, you may want to store it against your email for future use. However, the email delivery partner does not indicate which email the response is for. The response includes an SMTP ID, destination address, delivery status and a timestamp but nothing to identify the concerned email.
Here’s a little trick that will save your day!
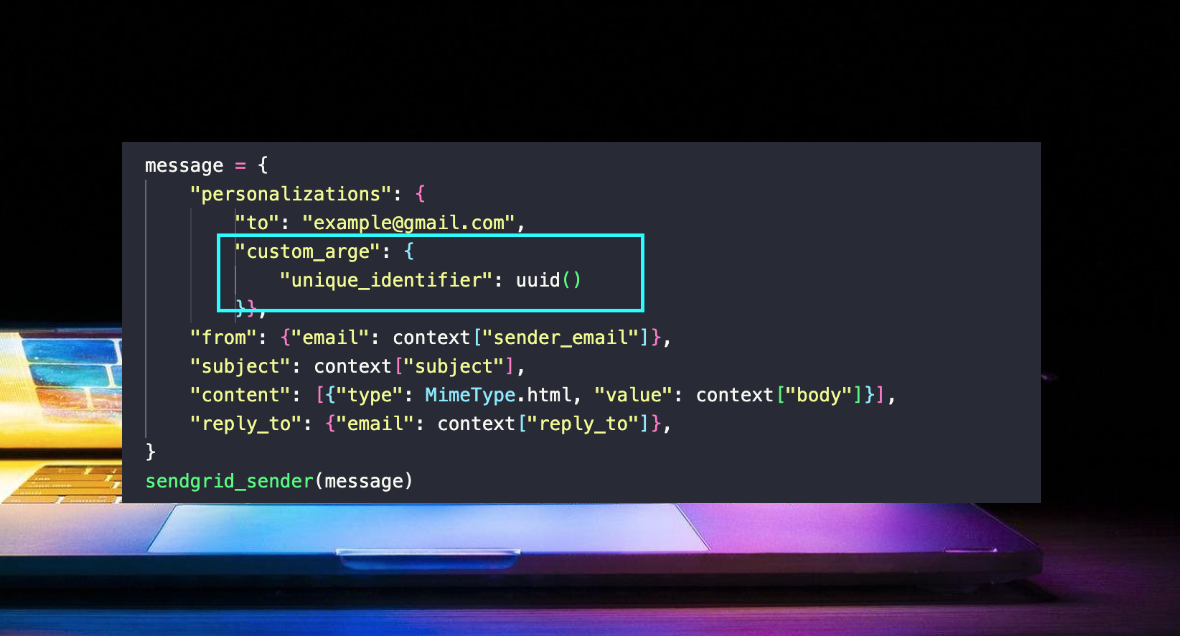
When sending the email, include a unique identifier in your email’s context and store that identifier against your email data. The response will now contain the identifier! Hence, you can compare the received identifier with the stored one and recognise which email the response is for.
Custom arguments key (custom_args) allows you to include any number of arguments and receive them with the response. Here’s how you can include custom_args while sending an email:
Here’s what the response will look like now:

READING INBOUND EMAILS
SendGrid POSTs the incoming emails’ data to an endpoint. The incoming email's data is not a simple JSON object and reading it requires a library or a tool that allows you to extract what you want. We used a library provided by SendGrid, called ‘parse’. Using parse, you can extract the body, subject and any attachments from the incoming data.
REPLYING TO AN EMAIL THROUGH YOUR CODE
Conversation via email is meant to be two-way which includes replying to an email. Sending an email reply is not as simple as it might seem. There are a couple of things that didn’t make sense initially and took me some time to understand.
Make your email a reply to some email:
The RFC protocol allows you to convert your email into a reply by adding ‘In-Reply-To’ in your email context. This tells an emailing service (Gmail, Outlook etc.) that the email is not new, rather a reply to a previous email. ‘In-Reply-To’ expects you to add an SMTP ID as its value.
The headers in your email context will now contain an In-Reply-To key as well:
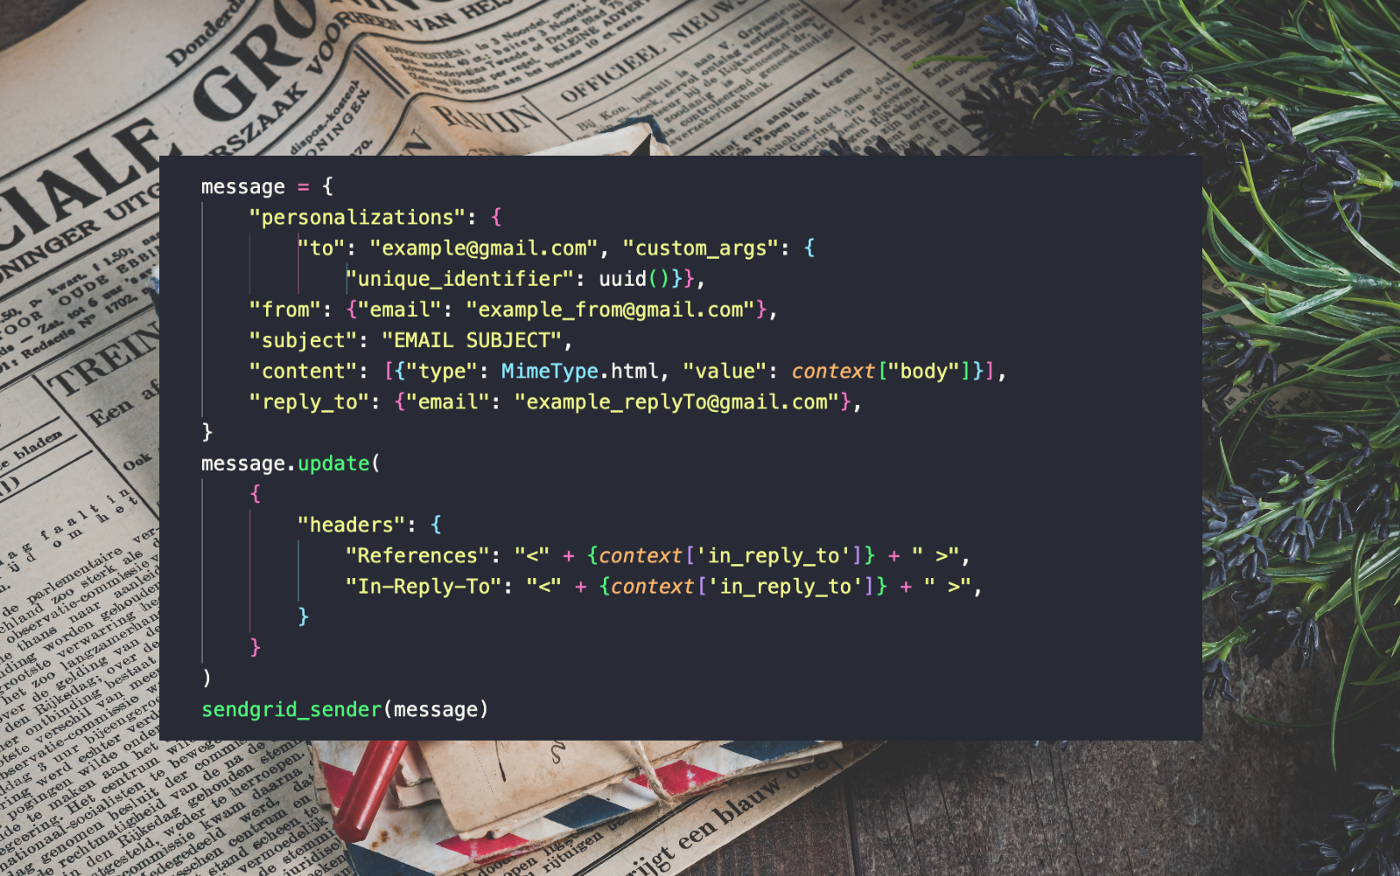
‘References’ keeps track of your email reply and stores a list of SMTP IDs of all the previous emails. The list pushes the most recent email ID at the end so that the last SMTP ID in the list is the ID of the email you replied to.
Since the users can reply to both incoming and outgoing emails, you need to store the SMTP IDs of both. The delivery response of an outgoing email contains its SMTP ID which you can store and use when replying to that email.
However, the incoming email data from any emailing service contains no SMTP ID :( Instead you need to store the Message-ID as an SMTP ID in your database record. Weird, no?
The < > rule, no mercy from emailing services:
While adding ‘In-Reply-To’ in your email context, don’t forget to wrap your SMTP ID with < > otherwise the emailing services won’t facilitate you XD
Appending the reply in the thread at emailing service:
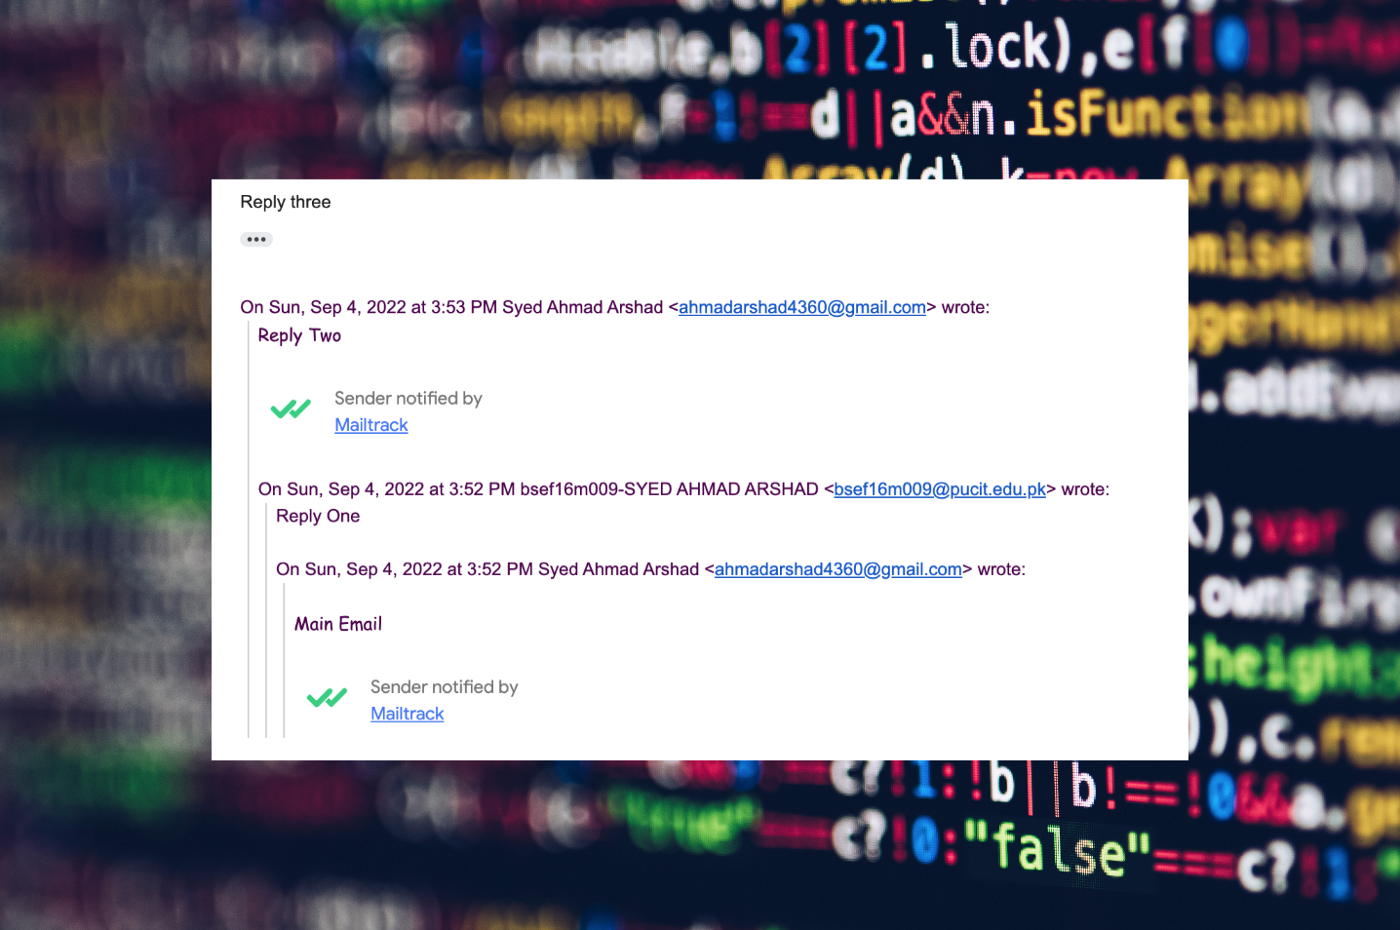
After adding ‘In-Reply-To’ in headers, you might expect it to create a conversation view in Gmail, Outlook etc., where each reply contains its history and clicking on it displays all the previous emails, like this:
Yet, even after adding ‘In-Reply-To’, the email reply I sent through my code did not contain the history. There was no icon I could click on to view which email I had replied to. This information was present in the headers but could only be viewed from the details.
It didn’t make sense to me and I expected the emailing services to treat my message as a reply once I added ‘In-Reply-To’. To make sure my message contains the history, I had to include it in the email reply’s body. Only then the three dotted icon became visible.
Here’s an example of how an email reply contains all the previous information in its body:
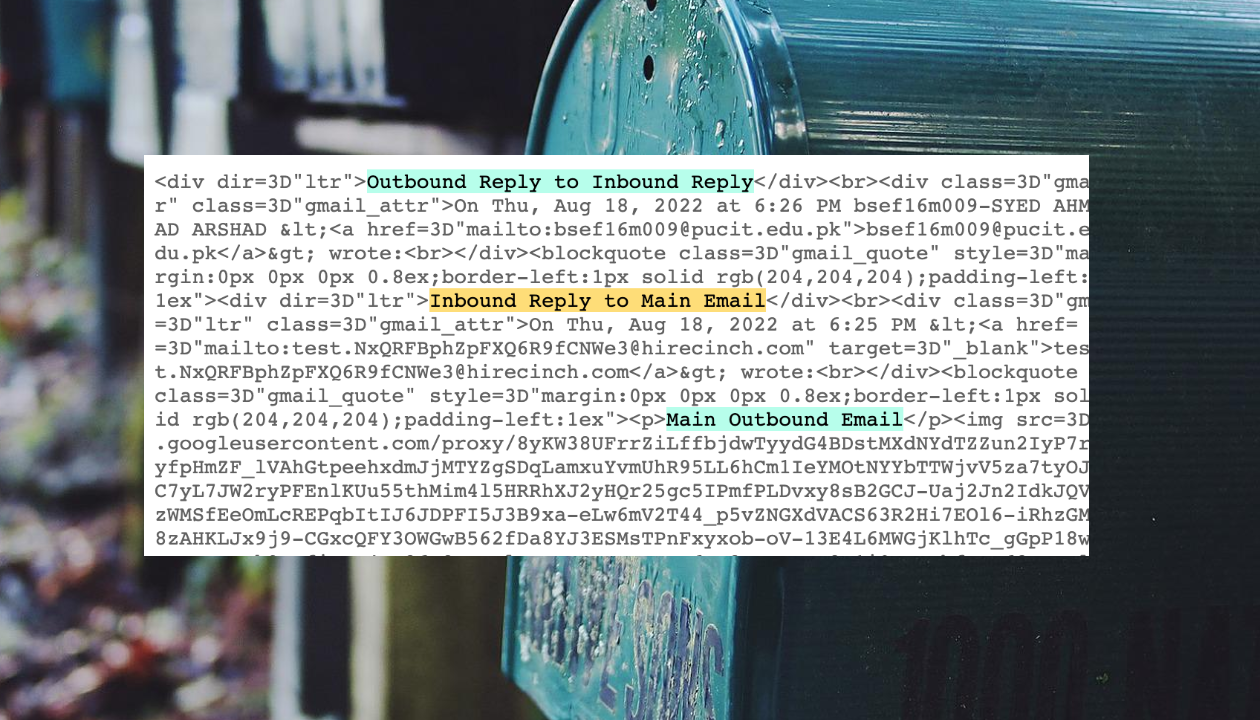
According to the sequence of actions in the image above, the 'Main Outbound Email' was the first email. An email reply was sent in its response, depicted as the 'Inbound Reply'. Next, a second email reply, 'Outbound Reply', was sent in response to 'Inbound Reply'. Therefore, the body of the last email reply contains the history of the email thread.
It's confusing but the emailing services require all the information if you want your email reply handled correctly.
That’s all folks!! If there are any further queries, feel free to reach out to us!


